
A size chart should answer a purchase question, not decorate a product page. Before building one, define the product family, the measurement type, the unit, and the person responsible for checking the numbers. A loose unisex tee, a fitted woven top, and a stretch legging should not inherit the same generic S–XL table merely because their labels look similar.

Photo: readyelements.com, CC0.
Collect the source data
Ask whether the supplier specification is a body recommendation or a finished-garment measurement. Record where each measurement is taken, whether the item is flat or stretched, the relevant tolerance, and the version date. Keep the editable source, not only a designed image. That record gives the next catalog editor a way to correct a number without recreating the chart.
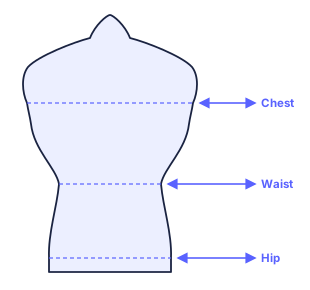
Publish only relevant columns
Choose columns that help the shopper decide. A dress may need bust, waist, hip, and length; trousers may need waist, hip, rise, thigh, and inseam; a shoe may need foot length and width. Every number needs a unit and method. “Width” is ambiguous unless the page explains whether it is flat width or circumference.
Add a decision note
The table needs a short instruction beside it: which point controls the fit, whether fabric stretches, and what to do between sizes. “Choose by hip for this rigid skirt; the waistband has no stretch” is useful. “True to size” is not, because it gives no method.
Before release, test the chart on a phone and at 200% zoom. Confirm that the exact product, its photography, its fit description, and its chart tell the same story. Use the full size chart QA checklist and keep a channel-ready version using our methodology.
A worked product-page example
Imagine a merchant launching a non-stretch, high-rise linen trouser. The supplier sheet lists a finished waist, hip, front rise, thigh, inseam, and leg opening for every size. The first publishing decision is not to paste every number into every product. It is to state that these are finished-garment measurements, measured flat or around the garment according to the supplied method, and to choose the measurements that control fit.
For this trouser, hip and waist are the primary decision points; rise and thigh explain the silhouette; inseam helps a shopper assess length. The product page should also say that the fabric has no stretch and that a shopper between sizes should choose by hip if the waist cannot be adjusted. This gives a concrete decision path instead of asking a customer to infer fit from an S–XL label.
Publish the chart as structured content
Keep the approved values in a record that can feed the storefront, an integration, and customer support. Store the product family, version date, source, reviewer, units, measurement method, and fit note with the rows. A chart image can be a helpful visual supplement, but it should not be the only source of the numbers. Structured content can be rendered on mobile, updated once, and checked by support without retyping.
Before publishing, run this final handoff:
- Scope: the exact SKU or fit family is named.
- Labels: every column names a body or garment measurement and unit.
- Method: flat, circumference, relaxed, and stretched states are disclosed.
- Fit note: the controlling measurement and between-size rule are visible.
- Review: a named person checked the source and version.
- Mobile test: the chart is readable without shrinking the text into an image.
For a shopper-side explanation of the numbers, link to Body Measurements vs Garment Measurements. For a reusable starting structure, use the SizeChartBase templates. The value of a product chart is not the number of columns; it is the confidence that the relevant numbers are accurate, explained, and connected to the product on the page.
Keep support and storefront aligned
The support team should see the same approved chart that a shopper sees. Add the chart version and effective date to an internal product record, and give support a short answer for the recurring questions: whether the values are body or garment measurements, where the garment was measured, and which measurement should control a between-size choice. This prevents an agent from inventing a rule in a ticket that conflicts with the product page.
Review the chart whenever a supplier changes a pattern, fabric, factory, or grading rule. Compare a small sample from the new run to the approved specification; if the fit family has changed, publish a new version rather than silently reusing the old table. After launch, tag size-related returns by product and reason. A recurring waist, length, or width complaint is evidence to revisit the chart, the measurement method, or the fit note—not merely evidence that shoppers chose the wrong label.
Example data record for one product family
Before a chart reaches the storefront, keep a source record with the SKU family, the approved sample date, supplier document reference, units, measurement state, tolerance and reviewer. For example: “linen trouser / SS26 / centimetres / garment measured flat / waist doubled only where stated / ±1 cm tolerance / reviewed by merchandising.” This record is not customer-facing clutter. It is the source that lets a content editor, support agent and developer render the same explanation everywhere.
The published product page can then be much simpler: state whether values are body or garment measurements, show the few columns that decide fit, explain the between-size rule and link to a measurement diagram. The more detailed record remains available for support and updates. This separation gives shoppers a clear answer while preserving the evidence behind it.