
“Always size up” is popular advice because it sounds safe. It is not a reliable rule. Sizing up can solve a tight chest, hip, or forefoot; it can also create slipping shoulders, excess length, heel movement, or a garment that no longer has the intended shape. The useful question is not whether larger is safer. It is which measurement controls the fit of this product.

Photo: nenadstojkovicart, CC BY 2.0, via Flickr.
Start with the least forgiving point
Identify the point that cannot comfortably be negotiated. For a rigid woven skirt, that is often the hip. For a button-front shirt, it may be chest or upper back. For trousers, it can be hip, thigh, rise, or waist depending on the cut. For shoes, length and width are separate decisions; extra length is not a dependable fix for a narrow forefoot.
Choose the size that accommodates that point according to the exact product chart. Then assess whether the remaining measurements and silhouette still work. A hem can often be shortened, but a seam that pulls across the fullest point usually signals that the size or cut is wrong.
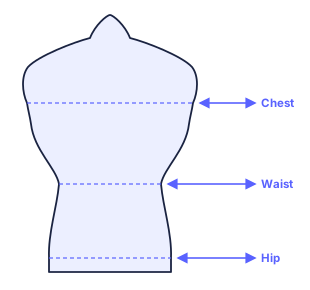
Read fabric and construction as evidence
Fabric stretch changes how close a garment can sit. A rib knit may recover after stretching; a rigid poplin skirt will not. Lining, waistband construction, closures, adjustable straps, and elastic panels also change the decision. Product photography may show the intended ease, but it should support—not replace—the written chart and fit note.
When the chart places you exactly between sizes, ask four paired questions:
- Rigid or stretch? Rigid fabrics favour the measurement with more room; stretch fabrics require checking recovery and intended support.
- Close or relaxed fit? A close fit may use less ease by design; an oversized item should not require automatic sizing up.
- Layered or worn alone? Coats, boots, and overshirts need the planned layers considered.
- Adjustable or fixed? Belts, drawstrings, and elastic can make one measurement more forgiving, but should not hide a mismatch at another point.
A short decision example
Suppose your hip is at the upper edge of size M and the lower edge of size L for a non-stretch trouser. The product has a fixed waistband and a tapered leg. Hip is the controlling point, so L is likely the safer first choice; the waistband and length must then be checked against the product’s measurements and alteration options.
Now change the product to a high-stretch legging with an elastic waist. The same body measurement does not automatically produce the same answer. Check the stated fabric, whether the brand calls it compression fit, and whether the chart gives a body recommendation rather than a finished dimension. M may be appropriate if the product is designed to stretch to that hip range.
Keep the return decision separate
Return policy matters, but it should not become the only sizing strategy. Use it to manage uncertainty after a reasoned choice: keep tags attached, try garments indoors, and compare with the conditions stated by the retailer. Do not order multiple sizes as a substitute for reading the chart when the information is already available.
For footwear, begin with the at-home foot measurement method and use the longer foot. For garment comparisons, measure a successful item using our flat T-shirt method. A clear decision framework will not remove personal preference, but it replaces a permanent “size up” rule with evidence from the item you are actually buying.
A two-minute decision record
When a chart leaves you between rows, write down four pieces of evidence before you choose: your controlling measurement, the row that contains it, the garment’s stretch or closure, and the fit you intend to wear. This sounds simple, but it stops a common error: using a familiar letter size to overrule the only measurement that cannot be negotiated.
For example, imagine a woven overshirt with a 102 cm chest recommendation for M and 108 cm for L. A shopper with a 101 cm chest may begin with M if the product is described as regular fit and will be worn over a T-shirt. The same shopper may start with L when the shirt is intended as an outer layer over a sweatshirt. The body did not change; the use case did. Record that reason alongside the size rather than treating either outcome as a universal rule.
If two sizes are both plausible, compare the finished-garment measurements against an item that already works. A 3 cm change in flat chest width is roughly 6 cm around the garment when the method is consistent. Compare shoulder, length and sleeve changes too. The larger row may add room exactly where it is needed, or it may only add length. That distinction is why the chart should be read as a set of measurements rather than a sequence of labels.